
Introduction:
In this guide, we’ll walk you through the process of hosting a Palworld multiplayer game on a server running Ubuntu or Debian. Additionally, we’ll cover how to maintain the game’s operation even after disconnecting from the server, as well as how to modify the port settings for optimal performance.
Palworld Server Setup Tutorial: Step-by-Step Guide
Playing Palworld:
To engage in Palworld, simply launch the desktop version on your local device. Upon opening the Palworld launcher, you have the option to participate in a multiplayer game through either an invite code (connecting to an in-game Palworld server) or a public IP address (linking to a dedicated Palworld server). This guide will focus on establishing a dedicated Palworld server.
In-game Palworld servers | Dedicated Palworld servers
Shared with players via invite code | Shared with players via public IP
Up to 4 players | Up to 32 players
Players can only join the game when the host is online | Players can always join the game
An in-game world that is created with “Start Game” in the Palworld launcher | World hosted on your own machine/server
Prerequisites:
- One local device to connect to the game.
- One server running Ubuntu or Debian to host the game.
- Access to the root user or a user with sudo permissions.
- Before initiating the game on the server, it’s advisable to perform some basic configurations, including setting up a firewall. For detailed instructions, refer to:
- Initial Server Setup with Ubuntu.
- Additionally, you may consider implementing measures to protect your game servers from DDoS attacks (optional).
- Ensure that steamcmd is installed on your server (refer to “Installation of SteamCMD”).
- Adequate RAM is essential, with a minimum of 8 GB recommended. The required RAM may increase with the number of mods or players participating in the game.

Example Terminology:
- 203.0.113.1: Example public IP address of the remote server.
- palserver: Example user on the remote server.
Step 1 – Getting the server ready
To add a new user, execute the following command:
sudo adduser palserverThis command will create a new user named “palserver” on your server.
After executing the command to create the new user “palserver,” you’ll be prompted to set a password. Ensure that you select a secure password. If you wish to skip providing additional information such as name, number, and phone, simply press enter when prompted.
Next, you can add the new user to the sudo group by running the following command:
sudo usermod -aG sudo palserverIt’s advisable to enhance security by adding an SSH key and disabling password login.
To switch to the newly created user “palserver,” use the following command:
su - palserverThis command will switch the current session to the “palserver” user.
To enable access to the game port on your server, you’ll need to configure your firewall to allow TCP and UDP traffic on the designated port. The default port for Palworld servers is 8211, but for enhanced security against DDoS attacks, it’s advisable to utilize a different port. This tutorial will demonstrate how to change the port from the default (8211) to 8212. If you intend to use the default port, ensure to adjust the port number in the provided commands accordingly.
| Description | Port |
|---|---|
| Default Palworld game port | 8211 |
| Palworld game port used in this tutorial | 8212 |
Ensure that your firewall settings permit inbound and outbound traffic on the chosen port to facilitate connectivity between your local device and the Palworld game hosted on your server.
Note: If you are using a different firewall, ensure that it permits incoming traffic to port 8212 TCP and UDP. If you intend to use the default port, you’ll need to allow port 8211 TCP and UDP instead.
Step 3 – Installing Palworld
Now that the server is prepared, you can proceed with installing Palworld using steamcmd. Ensure that steamcmd is installed as mentioned in the prerequisites.
| Name | Steam ID | Anonymous Login |
|---|---|---|
| Palworld Dedicated Server | 2394010 | Yes |
To install Palworld, follow these steps:
- Create a new directory for the Palworld files, adjust permissions, and navigate into the new directory:
mkdir PalworldServer && chown palserver:palserver PalworldServer && cd PalworldServer- Download the Palworld server files using steamcmd:
steamcmd +login anonymous +force_install_dir ~/PalworldServer +app_update 2394010 validate +quit- After downloading, navigate to the ~/PalworldServer directory and use the command ls -al to confirm that the files are available on your server.
- Add a steamclient.so file for 64-bit architecture:
When you install Palworld, it typically downloads a steamclient.so file for 32-bit systems. Before launching Palworld, you need to provide a steamclient.so file for 64-bit architecture in the .steam/sdk64 directory.
   mkdir -p ~/.steam/sdk64
   cp ~/PalworldServer/linux64/steamclient.so ~/.steam/sdk64/steamclient.so
Step 4 – Adding custom settings and custom port
By default, the Palworld game starts on port 8211. You can review all default game options in ~/PalworldServer/DefaultPalWorldSettings.ini. To modify default values, you’ll need to add the respective options in the following file:
~/PalworldServer/Pal/Saved/Config/LinuxServer/PalWorldSettings.ini
If you wish to alter all default settings, you can copy the entire content of DefaultPalWorldSettings.ini into PalWorldSettings.ini and adjust the values as necessary. In the example below, we’ll only modify the default name and port while adding a password. Additionally, we’ll disable raids and login penalties to mitigate memory leak issues that the dedicated Palworld server currently faces.
Edit the settings file:
mkdir -p ~/PalworldServer/Pal/Saved/Config/LinuxServer
nano ~/PalworldServer/Pal/Saved/Config/LinuxServer/PalWorldSettings.ini
Add a password, the new port and name, and disable raids and login penalties:
[/Script/Pal.PalGameWorldSettings]
OptionSettings=(ServerName="Test Palworld Server",ServerPassword="YourPassword",PublicPort=8212,bEnableInvaderEnemy=False,bEnableNonLoginPenalty=False)
Replace “YourPassword” with your chosen password.
To save the changes, press ctrl+X, then Y to confirm, and ENTER to close the file.
Step 5 – Starting Your Palworld Server
Now that all preparations are complete, you can commence the game. However, initiating the Palworld server in a regular terminal session will terminate the game as soon as the connection to your remote server ends. To maintain continuous operation of the game, you can utilize the screen tool, which facilitates the creation of separate virtual terminal sessions within a single remote terminal session.
When you conclude your remote terminal session, the virtual terminal session (screen session) persists. Upon initiating a new remote terminal session, you’ll observe that the screen session remains active.
Install screen:
If screen is not yet installed, you can install it now using the following command:
sudo apt update && sudo apt install screen -yTo launch a Palworld game within a screen session, follow these steps:
- Start the session:
screen -S palworld-screenYou can replace “palworld-screen” with any other desired name for your screen session.
- Navigate to the Palworld directory:
cd ~/PalworldServer- Commence Palworld:
./PalServer.shWith these commands, your Palworld server will initiate within a screen session, ensuring its continuity even after ending the remote terminal session.
Step 6 – Managing the Screen Session
You can manage the screen session using the following commands:
To detach from the screen session without ending it (the game will continue to run):
Ctrl+A, then DTo list all active screen sessions:
screen -listYou’ll see the screen session you created listed here.
To reattach to your running screen session:
screen -dr palworld-screenReplace “pal world-screen” with your screen name if you used a different name.
To delete the screen session:
screen -X -S palworld-screen quitNote: This action will terminate the Palworld game, and the screen session will no longer be accessible.
Step 7 – Auto-restarting Your Palworld Server
To enable automatic restarting of your Palworld server in case of a crash, you can create a script for this purpose.
If you’ve exited the Palworld screen session, use the command screen -dr palworld-screen to return. You can use ctrl+c to stop the Palworld game.
Follow these steps to create the shell script:
- Enter the command below to create a new shell script and save it in the same path as your Palworld server files (in this example, the ~/PalworldServer directory):
cat <<'EOF' >> ~/PalworldServer/run.sh
#!/bin/bash

while true; do
    ./PalServer.sh
    for i in 3 2 1; do
        echo "The server will restart in $i second(s), CTRL-C to cancel."
        sleep 1
    done
done

EOF- Make the script executable:
chmod +x ~/PalworldServer/run.sh- Start the Palworld server using the script:
./run.shNow, if the Palworld server crashes, it will automatically restart.
Step 8 – Joining Your Palworld Server

To join your Palworld server from your local device, follow these steps:
- Open the Palworld launcher on your local device.
- Select “Join Multiplayer Game.”
- Enter the following command:
palworld multiplayer- At the bottom of the screen, input your server’s IP address. Ensure to append the port at the end of the IP address, separated by a colon, in the format :. For example, if your server’s IP address is 203.0.113.1 and the port is 8211, you would enter:
203.0.113.1:8211. If you are hosting the Palworld server locally, you can use:127.0.0.1:<port>.
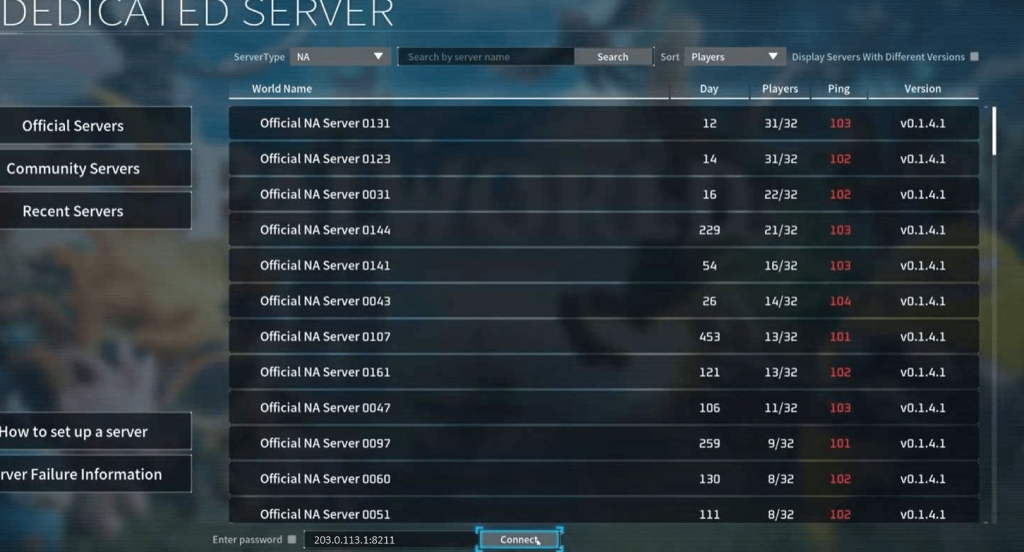
- After entering the server IP and port, select “Connect.”
- The Palworld launcher will initiate a connection to your game.
With these steps completed, you should now be connected to your Palworld server from your local device.
Conclusion:
In this tutorial, you’ve acquired the knowledge necessary to establish a server for hosting a Palworld game. Now, you can share the IP address of your server with friends to commence playing together. For further customization, you can edit the PalWorldSettings.ini file, as detailed in the tutorial. Additionally, it’s essential to be aware of the memory leak issue affecting the dedicated Palworld server, as mentioned in “Step 6.” To mitigate this issue, it’s recommended to periodically restart the server, such as every 8 hours, as discussed in this Reddit post for example.
With these steps completed, you’re well-equipped to enjoy the immersive world of Palworld with your friends on your very own server.